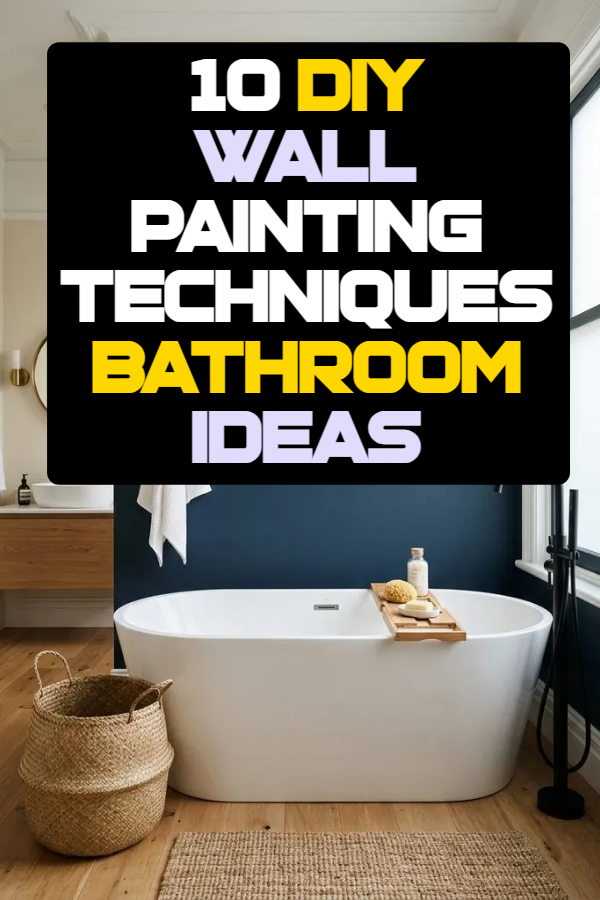
10 DIY Wall Painting Techniques Bathroom Ideas

Transforming a bathroom space using creative DIY wall painting techniques offers an accessible, high-impact way to upgrade home interior aesthetics without committing to expensive structural renovations. Bathrooms present a unique canvas due to their compact footprints and distinct lighting conditions, making them ideal spaces for experimenting with bold colors, subtle textures, and artistic paint applications. This guide provides step-by-step methods, clear material lists, and practical planning considerations for executing ten distinct paint techniques tailored specifically for bathroom walls. Readers will learn how to select moisture-resistant formulas, prepare surfaces correctly, apply specialty glazes, and implement geometric and textured designs that elevate standard drywall into stunning feature surfaces. Mastering these beginner-friendly projects allows homeowners to achieve customized, high-end visual appeal on an approachable budget.

Why This Idea Is Trending or Useful

DIY wall painting techniques remain among the most popular home decor inspiration topics across Pinterest and interior design platforms because they offer exceptional creative value at minimal cost. Bathrooms, in particular, benefit from visual wall treatments since tile installations and fixture upgrades can be cost-prohibitive. Applying specialized paint finishes allows individuals to introduce depth, movement, and structural character into otherwise plain spaces. Modern paint formulas designed for high-humidity environments make these decorative finishes durable and easy to maintain over time. Furthermore, these techniques cater directly to DIY enthusiasts of all skill levels, providing straightforward execution paths that yield professional-grade, custom results without requiring specialized trade experience or heavy equipment.

Materials and Preparation

Achieving a flawless decorative paint finish in a bathroom requires proper surface preparation and appropriate material selection tailored for humid environments. Begin by thoroughly cleaning drywall surfaces with a trisodium phosphate (TSP) substitute to remove soap scum, oils, and residue, ensuring optimal paint adhesion. Patch any wall imperfections with lightweight spackling compound, sand the surface smooth, and apply a quality stain-blocking moisture-resistant primer. Gather specialized tools such as painter’s tape, micro-fiber rollers, natural sea sponges, graining combs, stencils, and satin or semi-gloss latex paints formulation specifically rated for bathrooms. Proper room ventilation, masking off fixtures, and floor protection with heavy-duty drop cloths represent essential planning considerations that guarantee clean lines, safety, and efficient project execution.

10 Creative DIY Wall Painting Techniques for Bathrooms

1. Dual-Tone Horizontal Division Accen

Bold geometric color blocking in a bathroom. Source: Apartment Therapy

The dual-tone horizontal division technique creates the visual illusion of architectural depth by splitting a wall into two contrasting color blocks aligned horizontally. Measure up from the floor to approximately one-third or one-half of the total wall height, marking the wall at multiple points with a pencil. Connect the marks using a laser level and apply high-adhesion painter’s tape along the line, burnishing the edge firmly with a putty knife to prevent paint bleed. Paint the upper section in a lighter shade to keep the room feeling airy, and paint the lower section in a deeper complementary tone to anchor the room. Remove the tape while the final coat is still slightly tacky to achieve a razor-sharp division line. This method pairs exceptionally well behind vanities or clawfoot tubs, establishing a balanced aesthetic without requiring physical trim work or wainscoting.

2. Natural Sea Sponge Color Layering

How to Create

Soft sponge paint technique above wainscoting. Source: Reddit

Natural sea sponge layering adds organic depth and soft tonal variation to bathroom walls by applying a translucent glaze coat over a solid base color. Prepare the wall by applying two coats of a satin base paint in a neutral shade and allow it to dry completely for twenty-four hours. Mix a darker or complementary glaze by blending one part acrylic paint with three parts clear acrylic glazing medium. Dampen a natural sea sponge with water, wring out all excess moisture, and dip the flat side lightly into the glaze mixture, dabbing off excess paint onto a paper towel. Gently press the sponge onto the wall using a random, twisting motion to avoid repetitive patterns, maintaining uniform coverage across the surface. Work in small sections, blending overlap areas carefully to establish a cloudy, mottled texture that softens small bathroom proportions elegantly.

3. Geometric Angular Corner Blocking

Step-by-Step Guide

Geometric corner blocking uses sharp angles and overlapping shapes to turn plain bathroom corners into modern artistic focal points. Design a sketch incorporating intersecting triangles, arches, or polygons that span across adjacent walls or from wall to ceiling. Map out the design onto clean, primed drywall using a chalk line, pencil, and precision painter’s tape to define the sharp boundaries. Apply paint within the taped zones using a small foam roller, rolling away from the tape edges to keep lines perfectly clean and free of bleeding paint. Work sequentially by letting one geometric color shape dry completely before taping over it to paint an adjacent, overlapping geometric shape. This striking modern design technique works exceptionally well around small powder room mirrors, wall sconces, or towel bars, creating an energetic structural accent on a tiny budget.

4. Soft Cloud Edged Color Wash

Setup Method

The soft cloud color wash technique creates an ethereal, old-world plaster effect by blending wet glaze layers directly onto the wall with soft cotton rags. Apply a matte or satin base coat in a soft ivory or warm white tone and allow it to cure thoroughly. Prepare two separate glaze mixtures, one tinted a light grey-blue or soft sage and the other a slightly deeper accent shade. Dip a clean, lint-free cotton cloth into the primary glaze and apply it using sweeping, figure-eight motions across the wall surface to establish a sheer wash. Immediately take a secondary damp cloth to buff and blend the edges outward, working in small sections before the glaze sets. Layer the second darker glaze sparingly in select areas to add natural tonal movement, producing a relaxing, spa-like bathroom environment with subtle visual texture.

5. Masked Harlequin Diamond Grid

Step-by-Step Guide

A masked harlequin pattern brings classic geometric elegance to a bathroom feature wall using precise grid layout techniques. Paint the entire wall with the lighter background color and let it dry completely over forty-eight hours to ensure the base layer withstands masking tape. Calculate equal diamond dimensions based on total wall height and width, making small pencil marks to form a uniform grid across the wall surface. Connect the marks using low-tack painter’s tape to form crisp crisscross diagonal lines that outline the diamond pattern. Seal the tape edges by painting over them with a thin layer of the base coat paint, allowing it to dry to seal any micro-gaps. Fill in the open diamond shapes with the contrasting topcoat paint, then carefully peel away the grid tape to reveal crisp, two-tone diamond geometric lattice patterns.

6. Dry-Brushing Rustic Texture Sweep

Execution Process

Dry-brushing imparts a weathered, tactile wood-grain or linen-like finish onto bathroom walls through light, controlled brush strokes. Paint the wall with a solid satin base coat in a rich taupe, charcoal, or deep cream shade and allow it to cure fully. Dip a stiff-bristled masonry or chip brush into a contrasting topcoat color, wiping almost all paint off onto shop towels until the bristles appear almost dry. Hold the brush at a low thirty-degree angle relative to the wall and sweep it lightly in long, continuous vertical strokes across the surface without stopping mid-wall. Maintain consistent pressure to leave faint, broken lines that expose the underlying base coat in fine parallel striations. Continue applying overlapping vertical passes across the entire accent wall to build up a subtle, sophisticated texture that adds tactile character to rustic or modern bathroom designs.

7. Stamped Foam Block Pattern Overlay

How to Make

Hand-stamping allows homeowners to replicate expensive wallpaper designs custom-printed on a budget using hand-cut high-density foam blocks. Trace a simple geometric motif, such as an arch, leaf, or diamond, onto a piece of high-density craft foam or a rubber block and cut it out cleanly using a utility knife. Glue the carved foam shape securely onto a piece of flat acrylic or scrap wood to create an ergonomic stamp handle. Pour a thin, even layer of latex paint into a shallow tray, press the foam stamp evenly into the paint, and dabbing off excess pooled paint on scrap cardboard. Press the stamp firmly against the wall, using a laser level as a reference line to maintain consistent horizontal and vertical spacing. Repeat the stamping process across the wall, reloading paint regularly to construct a charming, hand-crafted wallpaper effect.

8. Vertical Striated Broom Dragging

Setup Method

Vertical striated dragging, often called strie, produces a tailored fabric-like texture resembling fine woven linen across bathroom walls. Paint the wall with a satin latex base coat and let it dry thoroughly before applying a heavy layer of colored glaze tinted two shades darker than the base coat. While the glaze remains wet, work in vertical sections about two feet wide by dragging a long-bristled strie brush or clean whisk broom down the wall from ceiling to floor in one continuous stroke. Wipe the broom bristles clean after every pass to prevent glaze accumulation from muddying the clean vertical lines. The stiff bristles pull back channels of wet glaze to reveal thin lines of the lighter base paint underneath. This refined technique adds height and formal structure to low-ceilinged powder rooms and main bathrooms alike.

9. Radiant Sunburst Arch Focal Point

How to Create

A painted sunburst arch serves as a vibrant, architectural headboard alternative or mirror backdrop in compact bathroom spaces. Measure the width of your vanity or mirror, and mark the center point on the wall where the top curve of the arch will terminate. Insert a small pushpin at the horizontal midpoint below, tie a pencil to a piece of string anchored to the pin, and swing the string smoothly to draw a perfect semi-circle arch top onto the drywall. Extend straight vertical lines down from the ends of the semi-circle to the floor or baseboard using a level and painter’s tape. Carefully outline the curved top edge by hand using a angled sash brush before filling in the interior arch shape with a small foam roller. Use warm rust, mustard, or terracotta shades to create a striking focal accent behind vanity mirrors or free-standing soaking tubs.

10. Comb-Patterned Scratched Texture Finish

Step-by-Step Guide

The comb-patterned paint technique uses notch-cut plastic squeegees or graining combs to carve decorative wave or geometric patterns into wet wall glaze. Coat the wall in a smooth, light satin base layer and allow it to dry for a full day. Apply a thick, generous layer of dark glaze over a manageable three-foot section of the wall using a medium-nap roller. Immediately press a rubber painting comb or notched trowel firmly against the wet glaze, dragging it in sweeping S-curves, concentric circles, or overlapping basketweave patterns across the surface. The comb teeth scrape away the top glaze layer to reveal the contrasting base coat beneath, producing a high-contrast relief pattern. Work quickly across adjacent wall sections to blend seam lines seamlessly before the glaze skim over, completing a striking artistic wall finish.

Common Beginner Mistakes and How to Avoid Them

Executing decorative wall painting techniques in bathrooms presents unique challenges that beginners can easily avoid with proper planning. The most common error involves using standard flat interior paint, which absorbs moisture and leads to mildew growth or peeling; always select satin or semi-gloss paints formulated specifically for high-humidity areas. Another frequent mistake is peeling painter’s tape after paint has dried completely, which tears edges; pull tape away slowly at a forty-five-degree angle while the final coat remains damp. Additionally, rushing surface preparation leads to premature paint failure. Skipping TSP cleaning or failing to prime patched drywall causes uneven glaze absorption and flashing. Finally, applying glaze layers too thickly prevents clean texture formation; test techniques on cardboard sheets beforehand to master glaze viscosity and pressure control before touching the wall.

Practical Tips for Better Results

Achieving professional-quality paint finishes requires attention to detail, correct tool handling, and methodical execution. Always invest in premium painter’s tape and low-lint micro-fiber rollers to ensure crisp lines and smooth application free of loose fibers. When working with glazes or decorative finishes, keep a damp microfiber cloth nearby to quickly wipe away mistakes before the paint sets. Work in manageable two-to-three-foot sections to prevent edge drying, which causes visible lap lines where wet and dry glaze overlap. Maintain consistent lighting by placing portable task lights in the bathroom to spot thin spots or uneven textures during application. Finally, ensure proper air circulation by running the exhaust fan or using a small floor fan during drying phases to help glazes set uniformly without sagging under high humidity.

Styling, Presentation, or Organization Ideas

A finished decorative accent wall serves as the aesthetic anchor of a bathroom, requiring thoughtful styling to highlight the painted craftsmanship. Complement textured or geometric walls by installing open natural wood shelving, floating brass towel racks, or frameless backlit LED mirrors that accentuate wall depth. Keep countertop clutter minimal by utilizing woven storage baskets, ceramic soap dispensers, and wall-mounted organizers that keep surfaces clear while echoing the wall’s color palette. Pair moody, dark textured walls with warm metallic hardware such as brushed gold or matte black faucets to create an elevated contrast. Incorporate moisture-loving potted plants like ferns or pothos on floating shelves to introduce fresh organic life that softens geometric paint lines and enhances the spa-like atmosphere of the renovated space.

Budget or Time Planning

Planning time and material expenses effectively ensures a stress-free DIY bathroom painting project. Most wall painting projects require a budget between fifty and one hundred fifty dollars for quality paint, glaze medium, specialty brushes, and surface preparation supplies. Allocate a realistic two-to-three-day timeline for completion, allowing ample drying time between base coats, glazes, and pattern application. Day one should focus entirely on cleaning, patching, sanding, masking fixtures, and applying the primary base paint layer. Day two involves layout mapping, taping patterns, executing the specialized decorative painting technique, and removing tape while damp. Day three provides necessary curing time before re-installing light fixtures, mirrors, and wall accessories, ensuring your newly painted surfaces cure safely without exposure to steam or water splashes.

Creative Expansion and Advanced Inspiration

Once comfortable with basic decorative paint application, homeowners can expand their skill set by combining multiple painting techniques for advanced visual effects. Consider pairing a low-wall dual-tone color block with a dry-brushed or stamped pattern on the upper wall section to mimic custom wainscoting. Experiment with metallic glazes—such as soft champagne, copper, or bronze powders mixed into clear glazing medium—to add subtle shimmer to combed or sea-sponge textured walls under vanity accent lighting. Advanced DIY decorators can also extend wall paint patterns directly onto the ceiling to create an immersive color-drenched canopy effect. These creative expansions allow endless personalization, enabling DIYers to transform standard bathrooms into unique, sanctuary-like spaces tailored precisely to their personal aesthetic preferences.

Similar Posts

Leave a Reply

Your email address will not be published. Required fields are marked *