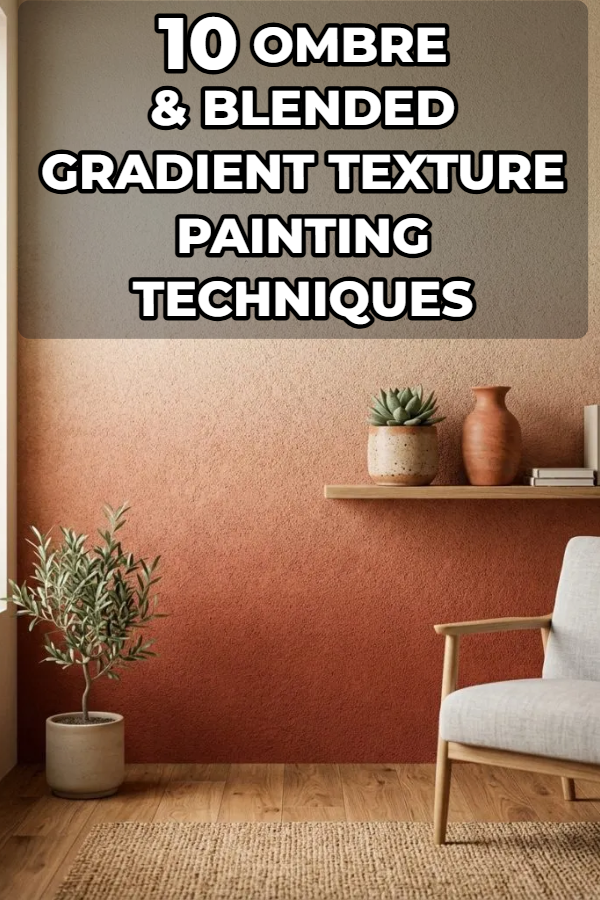
10 Ombre & Blended Gradient Texture Painting Techniques

Transforming plain drywall into a visually engaging surface often relies on fluid color transitions and tactile surface applications. Wall-focused artistic updates have gained significant traction on home decor boards, establishing smooth color shifts as a timeless approach to modern interior design. In this comprehensive guide, you will learn how to plan, layer, and execute seamless gradient color transitions paired with physical tactile surface finishes. Combining liquid paint blending with textured compounds softens rigid room layouts while adding sophisticated architectural depth to feature walls. Whether you plan to refresh a small bedroom, a quiet home office, or a formal entryway, mastering controlled paint application ensures balanced light diffusion across your living space. From subtle monochromatic washes to rich dimensional finishes, discovering how to integrate soft tonal shifts will elevate your overall aesthetic effortlessly. Exploring these curated Pinterest ideas offers clear step by step inspiration to execute stunning surface treatments confidently.

Why This Idea Is Trending or Useful

Soft color gradients paired with dimensional surface finishes are dominating modern Pinterest ideas because they counter the flat appearance of standard builder-grade paint. Traditional single-tone walls can feel sterile, whereas gradual chromatic transitions create an inviting visual depth that feels custom and artistic. This decorative approach provides immense practical value by allowing homeowners to alter perceived room dimensions without structural renovation. Darker shades applied near floor level anchor the space, while lighter tones near the ceiling elevate visual height significantly. Furthermore, working with blended wall finishes serves as an accessible DIY project for beginner creators seeking maximum stylistic impact on a modest budget. The combination of tactile materials like joint compound or silica sand with smooth blending techniques aligns seamlessly with contemporary minimalist style values. By uniting subtle movement with tactile interest, these trending ideas deliver versatile solutions suitable for any interior environment.

Materials and Preparation

Thorough wall preparation guarantees smooth blending and long-lasting material adhesion before your first coat touches the surface. Essential materials include premium interior acrylic paints in three complementary shades, lightweight joint compound, wall primer, painter’s tape, drop cloths, and fine-grit sandpaper. Necessary tools comprise a heavy-duty mixer attachment, synthetic blending sponges, microfiber paint rollers, wide soft-bristle brushes, a drywall trowel, and a spray bottle filled with clean water. Begin by thoroughly cleaning the target wall to remove dust, oil, and minor debris that could impair bonding. Repair surface cracks or nail holes using spackling paste, sanding the cured patches until completely flush. Apply a high-quality bonding primer to unify surface porosity across the entire wall area. Precise planning considerations require marking horizontal reference guidelines using painter’s tape to divide your gradient zones evenly, ensuring balanced color progression from base to top.

Main Ideas for Gradient Texture Painting

Idea 1: Horizontal Plaster Wash Gradient

Step-by-Step Guide

Creating a horizontal plaster wash gradient combines smooth tonal transitions with subtle plaster texture for an elevated wall surface. Select three tonal variations of a single hue, such as deep slate, medium ash, and pale mist. Mix a small portion of lightweight joint compound into each paint color to build a thick, workable paste. Apply the darkest paste to the bottom third of the wall using a wide drywall trowel, working in thin, sweeping horizontal strokes. Next, trowel the medium shade across the middle section, overlapping the dark base coat while the material remains workable. mist the border line lightly with water using a spray bottle, then blend the wet edges together using a damp natural sea sponge in gentle sweeping motions. Apply the lightest shade to the upper third, repeating the wet-on-wet misting and feathering process along the upper transition boundary. This tutorial method creates a tactile finish that catches ambient light softly.

Idea 2: Stippled Sand Transition Surface

How to Create

Integrating fine silica sand into your gradient paint application introduces a refined granitic texture across shifting color bands. Mix fine masonry sand directly into your selected paint shades at a ratio of one cup sand per gallon of paint. Paint the lowest section of your wall in your deepest chosen shade using a thick-nap microfiber roller to establish an even, gritty base layer. While that coat remains wet, roll the intermediate shade onto the center wall section, leaving a six-inch gap along the boundary. Load a dry, wide stippling brush with a equal mix of both shades, pounding the bristles gently over the wet junction line to break hard edges into a soft, textured mist. Finish the upper wall section with your lightest sanded shade, stippling the upper transition boundary similarly. The resulting surface offers high tactile interest, hiding minor wall imperfections while delivering a soft, glare-free aesthetic.

Idea 3: Vertical Ombre Sponging Technique

Setup Method

A vertical ombre sponging technique shifts color light-to-dark horizontally across a wall, creating an unexpected fluid transition from left to right. Begin by dividing your wall into three equal vertical bands using light pencil marks. Apply your foundation shade across the entire surface using a standard paint roller and allow it to dry completely. Wet a large cellulose masonry sponge, wring out excess water, and dab it into your second color shade. Working along the vertical transition zone, press the sponge against the wall in overlapping circular patterns to build a soft, cloud-like color progression. Repeat this sponging method along the final vertical segment using your darkest shade, blending backward into the middle section while the paint remains moist. This easy project yields a soft watercolor effect, making compact rooms feel wider through horizontal color movement and organic texture.

Idea 4: Distressed Lime Wash Fade

Execution Process

Achieving a distressed lime wash fade delivers an old-world mineral aesthetic characterized by soft chalky variations and gentle color blending. Prepare the wall surface with a specialized mineral primer to ensure optimal material bonding. Apply a deep mineral-based paint shade to the lower half of the wall using a wide block brush in loose cross-hatch strokes. Before the lower coat sets, brush a lighter mineral shade onto the upper half, working downward toward the center boundary line. Spritz the meeting point generously with clean water from a spray bottle, using a clean, dry block brush to feather the wet mineral pigments into one another. The water thins the mineral salts slightly, causing them to bleed together naturally into a soft, clouded transition. As the mineral paint cures, it develops a matte, velvety texture that softens hard room angles and complements rustic home decor elements beautifully.

Idea 5: Cross-Hatched Canvas Texture Blend

Step-by-Step Guide

Simulating the look of woven fabric on a gradient wall involves applying overlapping crisscross brushstrokes across shifting color zones. Paint three distinct horizontal color bands onto the wall, ranging from deep terracottas at the base to creamy off-whites at the top. While the paint remains completely wet, sweep a dry wallpaper smoothing brush vertically and horizontally over the color boundaries in a quick grid pattern. The stiff bristles pull small ribbons of wet pigment across the color divide, creating tiny intersecting lines that mimic natural linen fibers. Work in small three-foot sections to prevent the paint from skinning over before blending is complete. This creative project adds subtle physical ridges to the surface, transforming flat drywall into a rich, tactile feature wall. The woven effect diffuses direct sunlight effectively, making it an excellent choice for sunlit living spaces seeking subtle warmth and artistic structure.

Idea 6: Feathered Clay Ombre Finish

How to Make

Applying natural clay paint with a feathering technique produces a soft matte wall surface featuring seamless, velvety color transitions. Load a broad Venetian plaster trowel with dark clay paint and spread a thin layer along the bottom section of the wall. Immediately apply a lighter clay paint shade directly above the base section, keeping the material layer uniform in thickness. Hold a damp synthetic finishing sponge at a forty-five-degree angle and stroke lightly along the wet seam between both colors, drawing pigment upward and downward in short feathered motions. The dense structure of clay paint allows extended working time, making the feathering process smooth and forgiving for beginners. Finish by applying the lightest clay shade across the top section, feathering the final seam delicately. Once fully dry, lightly buff the surface with a soft microfiber cloth to bring out a subtle, suede-like sheen.

Idea 7: Comb-Structured Metric Gradient

Setup Method

Combining a geometric combed pattern with a soft color gradient introduces structured linear texture to shifting wall hues. Paint your gradient foundation using three shades of interior satin paint, blending the boundary lines with a wet sponge roller while the paint is fresh. Immediately apply a thin layer of clear glaze mixed with lightweight joint compound directly over the wet gradient using a flat trowel. Pull a notched plastic adhesive trowel through the wet gel mixture in continuous, sweeping horizontal lines from one side of the wall to the other. The teeth of the notched tool carve fine parallel grooves into the surface, exposing varying depths of the blended color gradient underneath. This actionable setup method establishes a strong modern design statement, catching light along the raised ridges while maintaining a calm, monochromatic color progression across the entire room.

Idea 8: Rag-Rolled Atmospheric Drift

Execution Process

Rag-rolling a color gradient creates a soft, atmospheric texture reminiscent of shifting fog or quiet morning skies. Roll your lightest paint shade over the entire wall surface as a base coat and let it cure fully for twenty-four hours. Mix your medium and dark paint shades with an equal part of acrylic glazing liquid to extend drying time and enhance transparency. Apply the dark glaze mixture to the lower wall section with a roller, then quickly roll a bunched-up, damp cotton rag down the wet surface to lift paint away in random organic patterns. Apply the medium glaze to the center wall, repeating the rag-rolling process while overlapping the lower dark boundary. The glaze layer allows the bright base coat to shine through the textured gaps, creating complex visual depth. This classic DIY technique hides minor wall unevenness while delivering a soft, cloud-like ambient finish.

Idea 9: Troweled Concrete Ombre Impression

How to Create

Recreating the industrial look of weathered concrete with a smooth color gradient involves troweling tinted mortar compounds onto drywall. Tint three batches of fine architectural wall plaster using liquid concrete colorants to achieve dark slate, cool grey, and soft alabaster tones. Apply the dark plaster shade along the bottom wall area using a flexible stainless steel trowel, pressing hard to keep the layer under one-sixteenth of an inch. Apply the medium grey plaster above it, using the flat edge of the trowel to drag the lighter paste down over the dark base while both remain wet. Complete the top section with the alabaster plaster, blending downward with broad, sweeping arcs. As you trowel, the metallic tool leaves burnished streaks and small pitted voids along the color transitions. The finished wall hardens into a durable, concrete-like surface featuring subtle tonal shifts ideal for urban loft aesthetics.

Idea 10: Swirled Metallic Gradient Accent

Step-by-Step Guide

Infusing metallic acrylic glazes into a blended color gradient adds a luminous, light-reflective shimmer to interior feature walls. Paint a seamless horizontal gradient onto your wall using dark charcoal, medium grey, and white latex paints, allowing the surface to dry completely. Mix gold or pearl metallic paint with clear glaze medium at a one-to-one ratio to create a translucent metallic coat. Dip a round stippling brush into the metallic mixture and apply it over the color transition zones using loose, overlapping figure-eight motions. The translucent glaze allows the underlying gradient colors to remain visible while adding a pearlescent shimmer that reacts dynamically to changing daylight. This beginner friendly project elevates simple neutral walls without requiring complex wall prep or heavy plaster materials. The subtle metallic sheen catches evening lamplight beautifully, making it an excellent inspiration choice for dining areas or master bedroom headwall accents.

Common Beginner Mistakes and How to Avoid Them

Executing a gradient texture project successfully requires avoiding several common application traps that compromise the final finish. A major mistake is allowing paint edges to dry before attempting to blend adjacent color bands together. Working on dry paint creates harsh hard lines rather than a smooth, gradual transition. Always blend using a wet-on-wet technique, working in small vertical sections if necessary to keep paint workable. Another frequent error is applying textured compounds or joint mixtures too thickly onto drywall. Heavy plaster layers tend to crack during drying and add excessive weight to wall surfaces. Maintain thin coats under one-sixteenth of an inch thick for optimal adhesion and structural integrity. Furthermore, using cheap paper tape along baseboards often allows liquid glazes to bleed underneath, ruining clean boundaries. Secure low-tack painter’s tape firmly with a putty knife along all trim borders before applying any wet paint or textured material.

Practical Tips for Better Results

Achieving professional results with blended paint finishes relies on controlled environmental conditions and precise technique. Keep room temperatures moderate and avoid working in direct drafts or high heat, which cause acrylic paints and glazes to dry prematurely. Use a continuous fine-mist spray bottle filled with clean water to keep transition zones moist while feathering color boundaries together. When working with textured pastes or silica sand additives, mix small batches frequently to prevent heavy particles from settling at the bottom of your container. Always step back several feet from the wall every few minutes to evaluate your gradient progression under ambient lighting. This broad perspective allows you to spot uneven color bands or harsh texture patches early while materials remain wet enough to adjust. Finally, clean your blending sponges and brushes frequently in clean water to prevent mudded color buildup during delicate feathering steps.

Styling, Presentation, or Organization Ideas

Styling a room around a textured gradient feature wall requires balanced decor choices that complement the wall’s movement without overwhelming the space. Position low-profile minimalist furniture against the dark base of the wall to ground the layout visually while leaving upper tonal transitions unobstructed. Pair organic wall textures, such as lime wash or troweled plaster, with natural wood furniture, linen textiles, and matte ceramic vessels to enhance tactile warmth. If hanging artwork on a gradient wall, select simple black or natural wood frames featuring wide white mat boards to isolate the art piece cleanly from background color movement. Keep lighting fixtures simple, utilizing warm wall sconces or indirect LED uplighting aimed toward upper light-toned sections. This targeted illumination emphasizes surface texture and heightens the atmospheric glow across your living space without introducing distracting shadows or glare.

Budget or Time Planning

Managing your budget and project timeline effectively ensures a smooth home decor transformation without unnecessary delays. A standard gradient feature wall project typically takes two full days to complete, accounting for surface preparation, base drying times, and final blending. Allocate approximately sixty percent of your overall budget toward high-quality paints, glazes, and textured compounds, as premium pigments blend more smoothly and offer superior coverage. The remaining funds should cover essential supplies like synthetic blending sponges, quality painter’s tape, and specialized trowels or brushes. Save money by purchasing a single gallon of white tintable base paint along with concentrated paint colorants to mix your intermediate gradient shades manually. Schedule your blending work during a continuous block of time so you can complete wet-on-wet transitions without stopping mid-wall, ensuring consistent texture and flawless color shifts throughout the entire project.

Creative Expansion and Advanced Inspiration

Once you master basic horizontal blending techniques, exploring advanced geometric and dimensional variations opens new artistic possibilities for your home. Experiment with diagonal gradient directions to add dynamic energy and visual motion to long hallways or stairwells. You can also combine stenciled geometric patterns over a completed ombre wall, using a matte varnish to apply subtle subtle sheen contrasts over soft color transitions. Another advanced concept involves layering floating wooden display shelves directly along the horizontal color shift lines, blending storage functionality seamlessly with decorative wall art. Alternatively, try extending the gradient pattern onto adjacent architectural elements, such as ceiling slopes or interior door panels, to create an immersive monochromatic room experience. These creative project concepts allow confident DIY enthusiasts to push design boundaries, transforming simple paint updates into custom, high-end architectural features that elevate your home aesthetic permanently.

Similar Posts

Leave a Reply

Your email address will not be published. Required fields are marked *