Crafting personalized stationery brings a delightful combination of practical organization and playful creative expression into home office spaces. Transforming an ordinary plastic desktop calculator using miniature resin flowers, lustrous flatback pearls, and sparkling rhinestones allows makers to produce functional yet visually striking desk accessories. This article explores step-by-step methods for executing custom bedazzled designs that enhance workspace aesthetics. Readers will learn how to select appropriate adhesive compounds, arrange botanical resin cabochons, balance color palettes, and seal delicate embellishments securely. Mastering basic bedazzling techniques enables crafters to convert plain office supplies into bespoke decor pieces or thoughtful handmade gifts. Incorporating tactile textures, floral motifs, and pearlescent accents elevates daily computational tasks into an enjoyable sensory experience while displaying individual artistic flair.
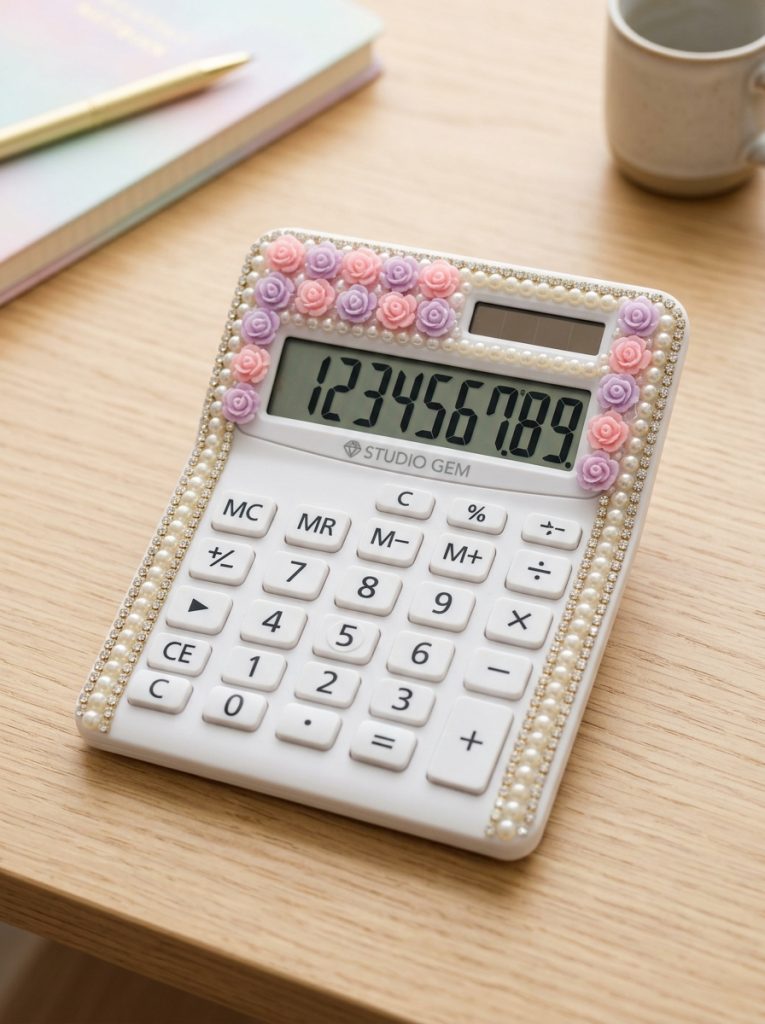
Modern Pinterest ideas frequently highlight customized desk accessories because they combine functional utility with highly shareable aesthetic charm. The trend of bedazzling electronic items with miniature resin flowers and flatback pearls appeals to DIY enthusiasts who want personalized stationery without significant financial investment. This creative project offers strong design relevance by allowing individuals to match office tools with broader room aesthetics, such as vintage coquette, soft pastel, or romantic cottagecore themes. The accessible, beginner friendly nature of resin embellishment makes it an easy project for crafters of all skill levels. Utilizing straightforward layout strategies and affordable craft materials ensures anyone can achieve polished, professional-looking results on a budget. As home office personalization continues to grow in popularity, these handmade calculators serve as charming conversation starters and practical decorative accents.
Proper preparation and material selection are essential steps for ensuring long-lasting adhesion and a balanced visual composition. Start by gathering a clean desktop calculator, an assortment of miniature resin flower cabochons, multi-sized flatback faux pearls, crystal rhinestones, strong jewelry adhesive, fine-tip tweezers, a wax rhinestone picker pencil, and isopropyl alcohol. Begin the preparation process by cleaning the plastic housing of the calculator with isopropyl alcohol to remove oil, dust, and manufacturing residues. Lightly scuffing the smooth plastic surface with fine-grit sandpaper creates microscopic grooves that significantly improve adhesive bonding. Plan your arrangement on a flat surface beforehand, sketching out central floral clusters and pearl fill patterns to visualize color distribution before applying permanent glue.
Pastel Resin Rose and Mixed Pearl Grid Border
Step-by-Step Guide
Creating a soft pastel floral border requires placing tiny resin roses along the outer frame of your calculator while leaving functional buttons completely unobstructed. Begin by cleaning the calculator casing thoroughly with rubbing alcohol and sanding the border edges lightly. Apply small dots of high-strength clear jewelry glue along the top edge above the digital display screen. Using precision tweezers, press three pastel pink resin rose cabochons in the center, flanking them with two soft lavender roses. Fill the remaining border space with three-millimeter cream-colored flatback pearls, placing them in a tight, uniform row using a wax picker tool. Continue this pearl border down the side bevels, placing miniature white rhinestones into any tiny gaps between the pearls. Allow the adhesive to cure completely for twenty-four hours before using the device.