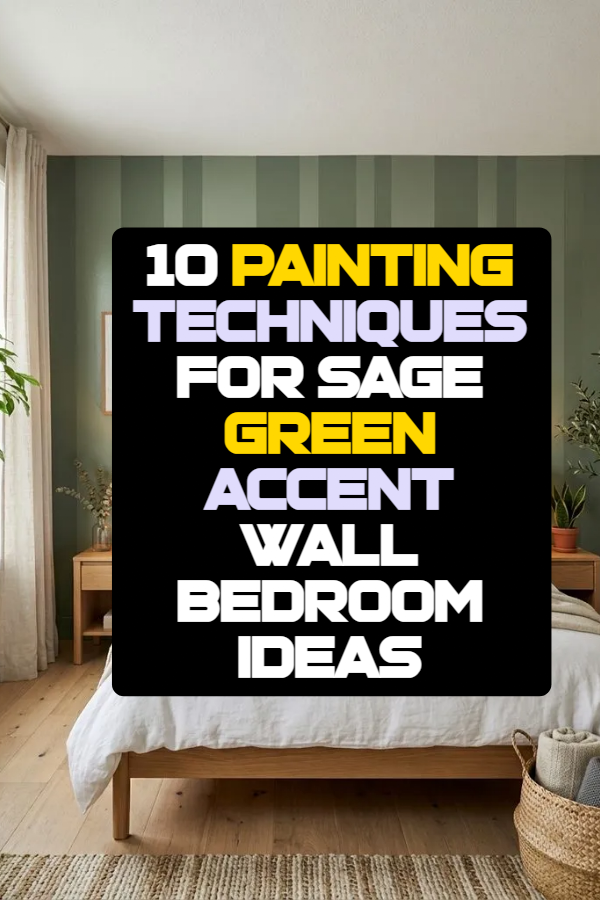
10 Painting Techniques For Sage Green Accent Wall Bedroom Ideas

Sage green accent walls have established themselves as a foundational element in contemporary bedroom design. This soothing botanical hue introduces a serene atmosphere that supports relaxation while providing a versatile background for various decorative styles. Readers exploring this guide will learn precise application techniques for establishing a sage green focal point, ranging from subtle color-washed glazes to structured geometric patterns. Mastering these specific paint application methods allows homeowners to transform plain drywall into a textured visual anchor without incurring substantial remodeling costs. The article details step by step procedures, surface preparation methods, and material selections required to achieve clean, durable results. By implementing these structured painting concepts, individuals can refresh their personal sanctuaries with elevated craftsmanship and long-lasting visual appeal.
Why This Idea Is Trending or Useful
Sage green wall concepts continue to dominate Pinterest ideas because they offer a balanced bridge between modern design principles and organic warmth. From a practical standpoint, sage green functions as a chromatic neutral, harmonizing effortlessly with warm wood tones, crisp white bedding, and metallic accents. The popularity of textured accent walls stems from their ability to add architectural depth to standard rectangular bedrooms without taking up physical floor space. Beginners appreciate the strong DIY appeal of these techniques, as most methods require simple tools, clear measurements, and basic taping or blending skills. Exploring these budget ideas enables individuals to personalize their bedrooms effectively, creating a sophisticated, custom aesthetic through accessible weekend creative projects.
Materials and Preparation
Achieving a high-quality paint finish requires diligent preparation and the right selection of supplies before applying any color. Essential materials include premium interior acrylic wall paint in a muted sage green shade, complementary base or accent paints, clear glaze medium, painter’s tape, drop cloths, and spackling compound. Tools needed for the execution include a tape measure, spirit level, fine-grit sandpaper, angled trim brushes, medium-nap synthetic rollers, and specialized applicators such as sea sponges, dragging brushes, or stencils. Preparation begins with cleaning the target wall thoroughly to remove dust and oils that compromise paint adhesion. Fill all nail holes or surface dents with spackling paste, sand smooth once dry, and apply a uniform primer coat. Finally, mask all adjacent trim, ceilings, and baseboards with precision-edge painter’s tape.
Vertical Board and Batten Faux Paint Effect How to Create
Construct the visual illusion of traditional wooden board and batten paneling using strategic taping methods and subtle sheen variations. Begin by painting the entire accent wall in a matte sage green base coat, allowing it to dry completely for twenty-four hours. Use a tape measure, spirit level, and pencil to mark evenly spaced vertical lines every twelve to sixteen inches across the wall span. Apply precise-edge painter’s tape directly centered over each pencil line, pressing the edges down firmly with a putty knife to prevent paint bleed. Roll a satin or semi-gloss topcoat in the exact same sage green hue over the entire wall, covering both the tape and exposed matte sections. Carefully remove the painter’s tape while the topcoat remains slightly damp to reveal crisp, light-reflecting vertical stripes that mimic architectural wood paneling.

Color-Washed Botanical Glaze Application Step-by-Step Guide
Create a soft, organic cloud texture reminiscent of historic European plaster by layering a diluted sage green glaze over a light background. Paint the wall with a flat off-white or pale beige base coat, allowing a full day for complete curing. Mix one part sage green acrylic paint with three parts clear acrylic glaze medium inside a clean mixing tray to create a translucent working glaze. Saturate a natural sea sponge or soft cotton rag with the glaze mixture, blotting off excess liquid on a clean paper towel until the applicator is damp. Apply the glaze across the wall in overlapping, figure-eight motions, working in manageable three-foot square sections. Muffle hard edges immediately using a clean, dry blending brush to produce a seamless, misty texture that adds quiet depth behind the bed.

Horizontal Ombre Sage Gradient Effect Setup Method
Establish a tranquil gradient that transitions smoothly from a rich forest sage at the baseboard to a whisper-light sage green near the ceiling. Divide the wall height into three equal horizontal bands using a light pencil mark and a spirit level. Prepare three paint trays containing dark sage green, medium sage green, and light sage green respectively. Roll the dark shade onto the bottom section and the light shade onto the top section, leaving a four-inch unpainted boundary zone along the intersecting lines. Apply the medium sage green into the middle section and immediately brush across the damp boundaries using a dry, soft-bristle brush in broad horizontal sweeping motions. Blending the wet paint edges together creates a smooth, seamless ombre transition that visually lifts the ceiling height.

Stenciled Geometric Lattice Accent Execution Process
Introduce structured geometric pattern work to your bedroom accent wall by combining a muted sage green background with a crisp white lattice overlay. Coat the entire surface in a rich, flat sage green paint and allow it to dry thoroughly before mapping out the pattern position. Secure a large-scale geometric or trellis stencil template in the top corner of the wall using low-tack painter’s tape and a spirit level. Load a high-density foam roller or stencil brush with a minimal amount of off-white acrylic paint, dabbing off excess on a tray to maintain a dry brush consistency. Press the paint through the stencil cutouts using firm, straight up-and-down motions to prevent paint from seeping beneath the template edges. Reposition the stencil across the wall surface using registration marks to complete a continuous, wallpaper-like grid.

Cross-Hatched Linen Strie Paint Finish How to Make
Simulate the tactile appearance of natural woven linen fabric on your accent wall through a two-directional dragging technique. Apply a smooth, satin base coat in a pale creamy sage tone, letting it dry completely for twenty-four hours to form a stable foundation. Mix equal parts medium sage green paint and translucent glaze medium, applying an even coat over a three-foot section of the wall with a short-nap roller. Immediately drag a dry, stiff-bristle wallpaper smoothing brush vertically through the wet glaze from ceiling to baseboard in a single continuous pass. Wipe the brush clean after every stroke, then repeat the process horizontally across the wall to create fine, intersecting thread marks that mimic woven fabric texture cleanly.

Diagonal Color-Blocked Split Wall How to Create
Establish a modern, energetic focal point behind the headboard by dividing the wall diagonally into contrasting sage and neutral fields. Paint the entire wall in a light warm grey or cream background shade and let it cure completely. Use a straightedge and carpenter’s level to mark a dramatic diagonal reference line extending from an upper corner to the opposite floor junction. Secure high-tack painter’s tape along the pencil line, burnishing the edge firmly to guarantee a tight seal against the textured drywall. Paint the designated lower geometric section with two coats of deep sage green, brushing away from the tape line to eliminate bleeding risks. Remove the painter’s tape at a sharp angle while the final coat is still damp to reveal an immaculate, modern color-blocked separation.

Distressed Rag-Rolled Textured Wall Step-by-Step Guide
Add rustic character and dynamic visual texture to a bedroom by rolling crumpled fabric across a wet sage green glaze. Apply a flat ivory base coat across the entire wall surface, providing a bright, clean background layer. Prepare a glaze mixture using two parts sage green satin paint and one part clear acrylic glaze, rolling an even layer over a vertical four-foot strip of the wall. Twist a clean, lint-free cotton rag into a tight, irregular rope shape and hold it securely at both ends. Roll the twisted rag downward across the wet glaze surface, allowing the folds of the fabric to pick up glaze randomly and expose the light base coat beneath. Continue this rolling process across the wall, overlapping passes slightly to produce a soft, weathered finish.

Stippled Granular Mineral Paint Finish Setup Method
Replicate the earthy, tactile feel of natural stone or brushed limestone by stippling a mineral-tinted sage green paint across the wall surface. Paint the wall with a uniform primer coat to neutralize existing colors and establish consistent surface suction. Dip the flat tips of a wide, thick block brush into a tray of textured, stone-look sage green paint, removing excess paint on the tray ridge. Tap the brush bristles firmly against the wall surface in a rapid, vertical pouncing motion, building up a dense, stippled layer of micro-texture. Work continuously across the wall to avoid visible seam lines, varying the angle of the brush strokes slightly to ensure a non-repeating pattern. The resulting matte, granular surface diffuses bedroom lighting softly, eliminating harsh reflections.

Monochromatic Half-Wall Arch Frame Execution Process
Define the sleeping area with a painted architectural archway motif that frames the bed against a light sage green background. Paint the entire wall in a soft, low-contrast sage green eggshell paint, allowing it to dry completely. Measure the width of your headboard and mark a centered rectangle on the wall, extending upward to roughly three-quarters of the wall height. Attach a string to a pencil, hold the string fixed at the top center of the rectangle, and sweep a precise semi-circular arch across the top boundary. Apply painter’s tape along the straight vertical sides and carefully trace the curved arch line using a fine artist’s detail brush. Fill the interior of the framed arch with a dark olive-sage paint using a small roller, creating a cozy, custom headboard recess effect.

Linear Metallic Pinstripe Accent Grid How to Make
Incorporate refined modern detail into a sage green wall by overlaying thin, light-reflecting metallic pinstripes across a dark sage background. Apply two coats of deep sage green matte wall paint across the entire surface, ensuring complete and uniform coverage. Use a laser level and measuring tape to mark narrow horizontal or vertical grid lines every eight inches across the wall. Apply parallel rows of narrow painter’s tape, leaving a precise quarter-inch gap exposed between the tape strips to form your pinstripe channels. Apply champagne gold or soft copper metallic paint into the exposed channels using a dense foam pouncer, applying minimal pressure. Carefully peel away the painter’s tape before the metallic paint sets completely, revealing clean, light-catching pinstripes that add subtle elegance.

Common Beginner Mistakes and How to Avoid Them
Executing a decorative accent wall project requires careful attention to material handling and preparation steps to achieve satisfactory results. A frequent mistake among beginners is skipping proper wall cleaning and priming, which leads to poor paint adhesion, bubbling, or uneven sheen levels. Another common error is using standard low-tack masking tape instead of specialized painter’s tape designed for crisp line isolation, resulting in bleeding along geometric patterns. Beginners often apply glazes or topcoats too thickly, causing unsightly drips and ruining subtle blended effects like ombre or strie dragging. Additionally, failing to maintain a wet edge during textured glaze applications creates harsh, visible seam lines where dry and wet sections meet. Avoid these issues by working in controlled sections, testing techniques on cardboard first, and keeping applicators moderately loaded.
Practical Tips for Better Results
Achieving professional-grade results on an accent wall depends on refined execution habits and proper environmental management. Always complete a test sample on a spare piece of drywall or heavy poster board before applying glazes or complex patterns directly to the wall. This allows you to adjust glaze ratios, refine brush pressures, and confirm how the sage green shade looks under both daylight and warm bedroom lighting. Ensure the bedroom maintains moderate temperatures and good ventilation, as excessive heat causes glazes to dry too quickly, preventing smooth blending. Work with a partner on full-scale wall techniques like ombre gradients or strie dragging to manage wet edges efficiently. Finally, keep a damp microfiber cloth nearby during painting to wipe away minor accidental smudges or tape bleeds immediately before the paint sets.
Styling, Presentation, or Organization Ideas
Integrating a sage green accent wall into your bedroom design requires thoughtful coordination with surrounding furniture, textiles, and decorative elements. Pair muted sage tones with natural materials like light oak dressers, rattan light fixtures, and woven jute area rugs to reinforce an organic aesthetic. Frame the accent wall with crisp white or cream bedding to create a clean, refreshing color contrast that highlights the wall depth. For textured finishes such as color washes or strie dragging, position warm directional wall sconces or bedside lamps to cast soft light across the surface, emphasizing subtle details. Keep surrounding decor uncluttered by utilizing floating wooden shelves or minimalist nightstands, allowing the painted feature wall to remain the primary visual focal point of the room.
Budget or Time Planning
Careful budgeting and project scheduling keep decorative wall updates cost-effective and manageable for home DIY enthusiasts. Decorative painting projects are inherently economical, as basic paint cans, glaze mediums, and simple applicators cost significantly less than purchasing custom wallpaper or wood paneling. Simple single-wall projects like diagonal color blocking or half-wall arch frames typically require six to eight hours of labor across a single weekend, including drying intervals. Complex layered treatments like ombre gradients or multi-pass strie dragging may require two full days to complete from surface preparation to final tape removal. Plan your timeline around the recommended drying times listed on paint cans, avoiding rushed application between coats. Investing in quality, reusable tools like spirit levels and professional brushes ensures long-term utility for future creative projects.
Creative Expansion and Advanced Inspiration
Once you master basic wall painting methods, exploring advanced material combinations opens up broader creative possibilities for bedroom design. Extend painted sage green motifs onto adjacent architectural features, such as painting matching tones on window trim, interior doors, or built-in shelving units for an immersive look. Combine geometric tape masking with alternating matte and high-gloss topcoats of the same sage shade, creating a sophisticated tone-on-tone pattern that shifts under changing room light. Incorporate subtle metallic powders into clear glazes when applying rag-rolling or sponging techniques to introduce an iridescent shimmer across textured walls. Experiment with multi-layered stencil designs, overlapping varying shades of sage and muted neutrals to create intricate, tapestry-like focal points that elevate your bedroom space uniquely.
