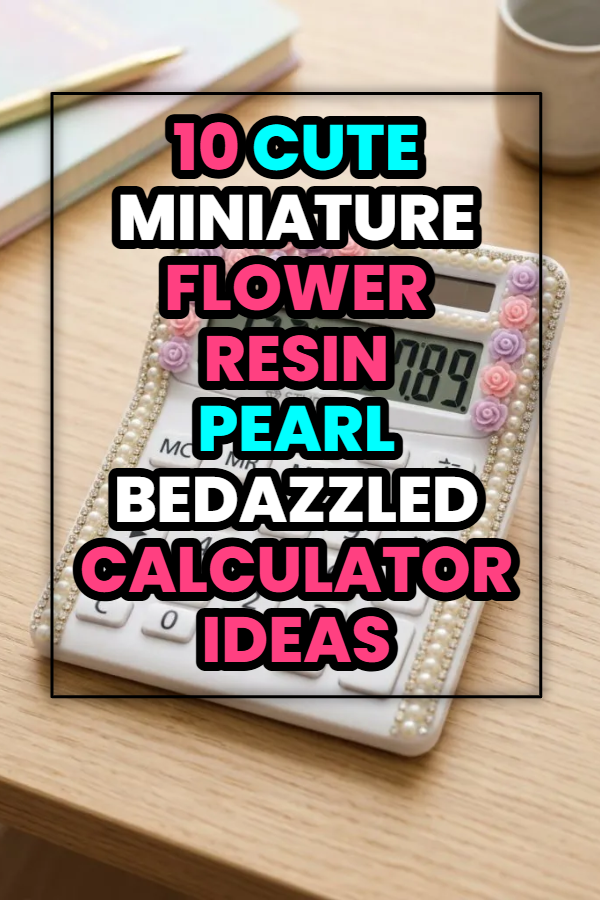
10 Cute Miniature Flower Resin Pearl Bedazzled Calculator Ideas

Crafting personalized stationery brings a delightful combination of practical organization and playful creative expression into home office spaces. Transforming an ordinary plastic desktop calculator using miniature resin flowers, lustrous flatback pearls, and sparkling rhinestones allows makers to produce functional yet visually striking desk accessories. This article explores step-by-step methods for executing custom bedazzled designs that enhance workspace aesthetics. Readers will learn how to select appropriate adhesive compounds, arrange botanical resin cabochons, balance color palettes, and seal delicate embellishments securely. Mastering basic bedazzling techniques enables crafters to convert plain office supplies into bespoke decor pieces or thoughtful handmade gifts. Incorporating tactile textures, floral motifs, and pearlescent accents elevates daily computational tasks into an enjoyable sensory experience while displaying individual artistic flair.

Modern Pinterest ideas frequently highlight customized desk accessories because they combine functional utility with highly shareable aesthetic charm. The trend of bedazzling electronic items with miniature resin flowers and flatback pearls appeals to DIY enthusiasts who want personalized stationery without significant financial investment. This creative project offers strong design relevance by allowing individuals to match office tools with broader room aesthetics, such as vintage coquette, soft pastel, or romantic cottagecore themes. The accessible, beginner friendly nature of resin embellishment makes it an easy project for crafters of all skill levels. Utilizing straightforward layout strategies and affordable craft materials ensures anyone can achieve polished, professional-looking results on a budget. As home office personalization continues to grow in popularity, these handmade calculators serve as charming conversation starters and practical decorative accents.

Proper preparation and material selection are essential steps for ensuring long-lasting adhesion and a balanced visual composition. Start by gathering a clean desktop calculator, an assortment of miniature resin flower cabochons, multi-sized flatback faux pearls, crystal rhinestones, strong jewelry adhesive, fine-tip tweezers, a wax rhinestone picker pencil, and isopropyl alcohol. Begin the preparation process by cleaning the plastic housing of the calculator with isopropyl alcohol to remove oil, dust, and manufacturing residues. Lightly scuffing the smooth plastic surface with fine-grit sandpaper creates microscopic grooves that significantly improve adhesive bonding. Plan your arrangement on a flat surface beforehand, sketching out central floral clusters and pearl fill patterns to visualize color distribution before applying permanent glue.

Pastel Resin Rose and Mixed Pearl Grid Border

Step-by-Step Guide

Creating a soft pastel floral border requires placing tiny resin roses along the outer frame of your calculator while leaving functional buttons completely unobstructed. Begin by cleaning the calculator casing thoroughly with rubbing alcohol and sanding the border edges lightly. Apply small dots of high-strength clear jewelry glue along the top edge above the digital display screen. Using precision tweezers, press three pastel pink resin rose cabochons in the center, flanking them with two soft lavender roses. Fill the remaining border space with three-millimeter cream-colored flatback pearls, placing them in a tight, uniform row using a wax picker tool. Continue this pearl border down the side bevels, placing miniature white rhinestones into any tiny gaps between the pearls. Allow the adhesive to cure completely for twenty-four hours before using the device.

Vintage Cream Peony with Cascading Seed Pearl Clusters

Setup Method

Designing a vintage-inspired aesthetic involves clustering larger resin peonies near the top corner and cascading smaller seed pearls downward across the blank plastic surfaces. Secure a five-millimeter cream-colored resin peony cabochon onto the top left corner above the display using epoxy or industrial craft adhesive. Position two smaller ivory blossom cabochons immediately adjacent to the main peony to form a dense floral anchor point. Using a fine-tip glue applicator, draw delicate swirling lines extending downward toward the clear button margins. Place one-millimeter and two-millimeter flatback faux pearls along these adhesive lines, tapering the density from thick clusters down to sparse single pearls near the bottom edge. This asymmetrical layout creates a elegant, flowing look that protects button functionality while maximizing decorative impact.

Bright Daisy Blossom and Iridescent Bubble Pearl Encasement

How to Create

Achieving a cheerful, spring-themed calculator design relies on combining vibrant yellow-centered resin daisies with shimmering iridescent mermaid pearls. Clean the surface of a white or pastel calculator before arranging seven mini resin daisy cabochons in an alternating zig-zag pattern across the upper casing. Secure each daisy with a tiny drop of clear gel adhesive, pressing firmly for five seconds to eliminate air bubbles. Fill the entire surrounding empty space around the display and outer margins with mixed-size iridescent flatback pearls ranging from two to five millimeters. Use a wax stylus to pick up individual pearls, placing larger pearls in open areas and smaller ones close to button edges. The light-refracting property of iridescent pearls complements the bold daisy centers, giving the device a lively, textured finish.

Romantic Cherry Blossom Branch with Blush Pearl Accent Fill

Execution Process

Simulating a flowering cherry blossom branch across your calculator requires placing dark brown resin branch pieces or painted lines topped with tiny pink blossoms. Draft a subtle, diagonal branch outline across the upper casing using a fine-point permanent marker as a placement guide. Glue thin, twig-shaped resin pieces or dark brown flatback rhinestones along the line, creating realistic structural forks. Attach two-millimeter light pink resin cherry blossom cabochons along the branch nodes, ensuring some blossoms overlap the line for natural depth. Fill the remaining negative space surrounding the display with soft blush-pink flatback pearls arranged in dense clusters. This delicate botanical composition provides an artistic, nature-inspired focal point while keeping the keypads fully visible and easy to operate.

Lavish Garden Bouquet Corner Accent with Pearl Frame

Step-by-Step Guide

Building a rich, three-dimensional garden bouquet requires layering resin flowers of varying sizes and colors onto the top corner of the device. Select an assortment of miniature resin flowers, including blue forget-me-nots, yellow buttercups, and white lilies, measuring between three and eight millimeters. Apply a generous layer of thick gel adhesive to the upper right corner of the calculator housing. Press the largest resin lily cabochon into the center, surrounding it immediately with smaller forget-me-nots and buttercups to form a dense, dimensional bouquet cluster. Outline the entire outer edge of the calculator screen with a single, neat row of four-millimeter flatback pearls to frame the display clearly. This balanced combination focuses complex detail in one secure zone while maintaining clean lines across the remainder of the casing.

Sunburst Sunflower Layout with Gold-Core Pearl Highlights

Setup Method

Constructing a radiant sunburst design involves placing a vibrant resin sunflower in the center of the upper casing and fanning pearl lines outward. Affix a ten-millimeter resin sunflower cabochon directly above the digital display screen using heavy-duty clear craft adhesive. Draw straight, radiating adhesive lines extending outward from the sunflower toward the edges of the calculator body using a fine precision nozzle. Place alternating rows of gold-backed glass rhinestones and cream flatback pearls along these radiating lines, decreasing the stone size as you reach the outer borders. Fill the immediate area surrounding the sunflower base with tiny golden seed pearls to emphasize the warm, glowing theme. The geometric symmetry of this layout creates a bold visual statement that instantly draws attention to your desk setup.

Soft Lavender Field Motif with Pearl and Crystal Grid

How to Make

Recreating a soothing lavender field style requires arranging purple resin blossoms alongside vertical rows of delicate pearls and clear rhinestones. Position six small light-purple resin flower cabochons horizontally across the top section of the calculator, spacing them evenly apart. Using clear industrial adhesive, lay vertical lines of two-millimeter flatback pearls extending downward from each floral anchor point toward the top row of keys. Interweave single three-millimeter violet crystal rhinestones between the pearl strands to introduce subtle shine and depth. Keep the bottom half of the calculator clean, applying pearls only to the outer bevels to avoid interfering with daily numerical entry. The structured vertical grid offers a neat, modern aesthetic that feels organized yet artfully detailed.

Cottagecore Wildflower Meadow with Mixed Pearl Backing

Execution Process

Developing a charming wildflower meadow design involves scattering diverse mini resin blossoms across a full bed of flatback pearls. Cover the upper non-button surfaces of the calculator with a smooth, thin layer of clear slow-curing craft adhesive. Randomly scatter tiny resin wildflowers, such as mini daisies, red poppies, and blue cornflowers, across the wet adhesive surface. Fill every small gap between the flowers using a mixture of ivory, champagne, and soft white flatback pearls in various sizes. Use a wax picker tool to press each piece firmly into the glue layer, ensuring all embellishments sit level and flush against one another. This dense, full-coverage technique hides plain plastic surfaces entirely, creating a rich, tactile surface reminiscent of a blooming meadow.

Elegant Monochromatic White Garden with Pearl Rim

Step-by-Step Guide

Crafting an all-white textured design relies on layering white resin camellias, gardenias, and pure white pearls for a sophisticated, minimalist look. Select a crisp white calculator casing and wipe it down with isopropyl alcohol to remove surface oils. Secure three white resin camellia cabochons of varying diameters across the top right header area using clear jewelry glue. Encircle the outer perimeter of the calculator with two parallel rows of three-millimeter pure white flatback pearls, creating a structured border. Fill the remaining space around the camellias with tiny two-millimeter white pearls and clear AB rhinestones to catch ambient room light. The subtle interplay of matte resin petals, glossy pearls, and sparkling crystals delivers a refined, high-end appearance that complements modern minimalist office spaces.

Tropical Hibiscus Accent with Shimmering Pearl Clusters

How to Make

Designing a vibrant tropical theme requires placing bold resin hibiscus flowers alongside warm golden and iridescent pearl accents. Affix two bright coral-pink resin hibiscus cabochons onto the upper left corner above the screen using durable clear adhesive. Surround the hibiscus petals with tiny green resin leaf cabochons to provide realistic contrast and structure. Fill the remaining top panel and side margins with a combination of warm bronze, champagne, and gold-coated flatback pearls. Use smaller two-millimeter pearls near the screen border to maintain a clean viewing frame while placing larger five-millimeter pearls along the outer structural edges. This warm, tropical color scheme adds an energetic splash of personality to routine office tasks while keeping all electronic components fully functional.

Common Beginner Mistakes and How to Avoid Them

A frequent error in calculator bedazzling is placing thick resin flowers or large pearls too close to the keypad buttons, which restricts movement and impairs usability. Avoid this issue by leaving a clear one-millimeter buffer zone around every key, ensuring buttons press down smoothly without catching on adjacent gems. Another common mistake is using instant cyanoacrylate glues, which release vapors that fog plastic displays and leave brittle bonds. Always select specialized clear jewelry adhesives or flexible craft gels that cure transparently without clouding sensitive screen covers. Additionally, applying excessive adhesive causes ugly glue squeeze-out around delicate pearl bases. Use a fine-tip applicator or toothpick to place controlled, tiny glue droplets directly onto individual cabochon backs for a clean, professional finish.

Practical Tips for Better Results

Achieve long-lasting durability and superior aesthetic balance by incorporating smart preparation techniques and quality control measures. Always sort your pearls and resin flowers by size and color into small trays before beginning the gluing process, saving time during assembly. Use a wax-tipped rhinestone picker tool rather than fingers or bulky tweezers to handle tiny two-millimeter pearls precisely without smudging wet adhesive. Allow your completed calculator to cure undisturbed on a flat surface for a full twenty-four to forty-eight hours before placing it into a pencil pouch or desk drawer. Applying a thin coat of clear brush-on topcoat or water-based sealant over the pearl borders helps lock tiny stones into place, preventing accidental dislodgement during daily handling and transport.

Styling, Presentation, or Organization Ideas

Integrating your newly bedazzled calculator into a cohesive desk aesthetic enhances overall workspace harmony and visual appeal. Pair your custom floral calculator with matching pastel desk pads, brass pen holders, and clear acrylic organizers to build a curated aesthetic. Display the calculator on a small wooden or easel-style holder when not in use, turning a functional tool into an charming piece of desk art. Coordinate the color palette of your resin flowers with existing stationery items, such as pastel highlighters, floral notebooks, and patterned mouse pads. Keeping surrounding desk surfaces tidy and uncluttered allows the intricate details and sparkling textures of your handmade creation to stand out as a stylish focal accent.

Budget or Time Planning

Executing a bedazzled calculator project requires modest financial investment and can be completed efficiently within a single afternoon. A basic battery-powered desktop calculator, bulk packs of resin flower cabochons, and mixed flatback pearls can be sourced affordably from online craft suppliers. The active assembly process typically takes between one and two hours, depending on the complexity and density of your chosen layout. Setting aside an extra thirty minutes for surface preparation and planning ensures a smooth workflow without unnecessary interruptions. Buying craft materials in multi-color bulk assortments allows you to create multiple decorated items or share supplies with friends, making this creative project an economical choice for group crafting sessions or personalized gift-making.

Creative Expansion and Advanced Inspiration

Once you master basic calculator embellishment, apply these resin flower and pearl bedazzling techniques to other everyday office accessories. Upgrade plain staplers, tape dispensers, scissors, and acrylic pen cups with matching floral clusters and pearl borders to form a complete custom desk collection. Experiment with creating dimensional layers by stacking tiny resin blossoms on top of larger leaf bases using UV resin for instant curing. Incorporate personalized elements like flatback pearl initials, miniature charms, or color-coordinated glitter fills into open negative spaces for added uniqueness. Expanding your custom crafting skills across multiple items transforms ordinary workspaces into inspiring, highly personalized sanctuaries that reflect your individual style and passion for detail.

Similar Posts

Leave a Reply

Your email address will not be published. Required fields are marked *